





Set up the REST API and API keys
Simple Points and RewardsUpdated October 27, 2026
The REST API lets other software read and change points data in your store. For example, a POS system can show a customer’s balance, or Zapier can give points when a form is sent. Switch it on at Points & Rewards › API, Webhooks & AI › REST API. The API is off by default, and every request is refused until you switch it on.
Switch on the REST API
- Go to Points & Rewards › API, Webhooks & AI and open the REST API tab.
- Click Enable API.
- Copy the Base URL from the Getting started box. It looks like
https://example.com/wp-json/spar/v1.
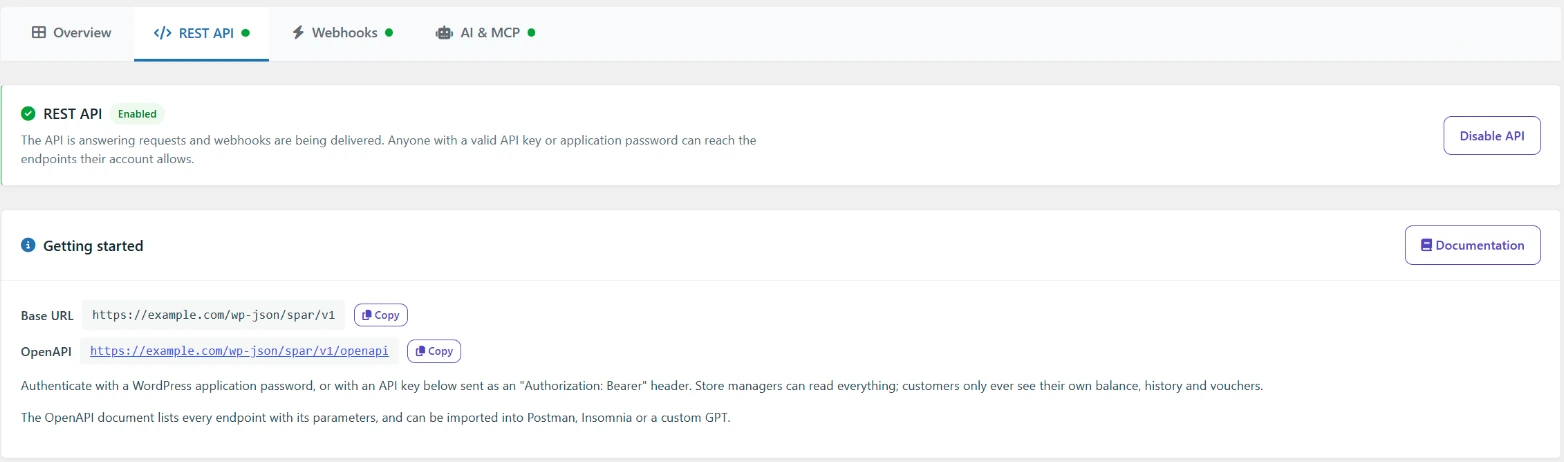
To switch the API off again, click Disable API. Anything that uses the API stops working, and no more webhooks are sent.
Create an API key
An API key is the simplest way for another tool to sign in.
- On the REST API tab, go to API Keys and click Create API key.
- Enter a Description, such as “Zapier integration”.
- Check Acts as user ID. The key gets the same permissions as this user. Use a store manager’s ID for store-wide access, or a customer’s ID for a key that can only see that customer’s own points.
- Choose the Scopes.
- Optionally, set an Expires date. The key stops working at the end of that day.
- Click Create API key and copy the key straight away. It starts with
spar_and is only shown once.

Choose the scopes
- read: read customers, balances, history, rewards, vouchers, reports and events.
- write: add or remove points, set balances, ban customers and claim rewards.
- manage: manage API keys and webhooks. A key with this scope can create more keys, so treat it as full access.
Give AI tools and third-party services the read scope only, unless they need to change data.
Send the key with each request
Send the key in an Authorization: Bearer header:
curl https://example.com/wp-json/spar/v1/customers
  -H "Authorization: Bearer spar_your_api_key"
You can also send it in an X-SPAR-API-Key header. Keys only work over HTTPS, unless the site is set to a local or development environment. A key only works with the Simple Points and Rewards API, not with other WordPress endpoints.
Use an application password instead
The API also accepts WordPress application passwords. Create one under Users › Profile › Application Passwords and send it with HTTP Basic authentication. An application password uses the permissions of its WordPress user, and scopes do not apply to it. WordPress only offers application passwords on sites that use HTTPS.
Switch off endpoints you do not use
The Available endpoints table lists every endpoint, who can call it and the scope it needs. Untick an endpoint in the On column and click Save endpoint settings. A switched-off endpoint returns a “no route found” error. Endpoints added in later updates are switched on automatically.
Rate limits
Each API key or signed-in user can make 120 requests a minute. Requests without a sign-in are limited to 30 a minute. Over the limit, the API returns a 429 error. After 20 failed key sign-ins from one IP address within 15 minutes, further attempts from that address also get a 429 error for a while.
Revoke or delete a key
Click Revoke next to a key to stop it working straight away. You can then remove a revoked key with Delete. The Last used column shows when the key was last used, updated at most every 5 minutes.