





Add your own fields to the exemption form
Updated September 14, 2026
The Custom Fields tab at Tax Exemption › Settings lets you add your own fields to the exemption form when Name, Reason and a registration number are not enough. This is a PRO feature. Fields appear wherever the exemption form is shown: checkout, cart, My Account and the registration form.
Add a field
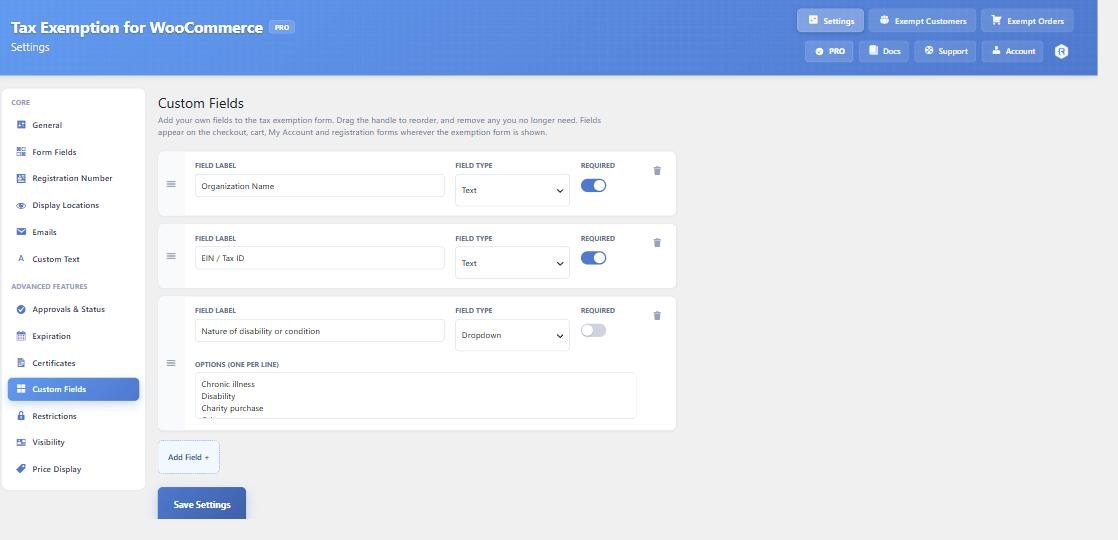
Click Add Field and fill in:
- Field Label — what the customer sees, for example “Disability or chronic illness”.
- Field Type — Text, Text Area, Dropdown, Radio Buttons, Checkbox, Number or Date.
- Required — whether the customer must complete it to claim exemption.
- Options — one per line. This box only appears for Dropdown and Radio Buttons.
Drag the handle on the left of a row to reorder fields; the trash icon removes one. Remember to save the settings page afterwards.
Where the answers appear
Custom field answers are stored against the customer and copied to each order. They show up with your labels on the Exempt Customers and Exempt Orders pages, in their CSV exports, on the admin order screen, and in the {exemption_info} table in the exemption emails.
Don’t delete a field you still need
Each field keeps an internal ID, and customer answers are stored against that ID. Removing a field from this tab stops it being asked and stops the stored answers being displayed, but the answers themselves stay in the database. If you delete a field by mistake, adding a new one back will not reconnect the old answers — it gets a new ID. Rename an existing field rather than deleting and recreating it.
Keep the form short
Every required field is another thing standing between a customer and a completed order. If you need a lot of detail, consider hiding the fields at checkout so customers complete them once on their My Account page instead.