




WooCommerce does not include a wishlist. To add one, you install a wishlist plugin and choose where its “Add to wishlist” button appears. This guide goes through that setup with Simple Wishlists for WooCommerce, including the wishlist page, guest wishlists, sharing and a wishlist link in your header.
We make Simple Wishlists, so the steps below use it. The main setup only uses features from the plugin’s free feature list. Paid features, such as price drop emails, have their own section and are marked PRO. If you would prefer another plugin, or a theme with a wishlist included, there is a section on other options near the end.
In this guide
- What a wishlist does in a WooCommerce store
- What you need before you start
- How to add a wishlist to WooCommerce
- Price drop alerts and other PRO features
- Moving from another wishlist plugin
- Other ways to add a wishlist to WooCommerce
- FAQ
What a wishlist does in a WooCommerce store
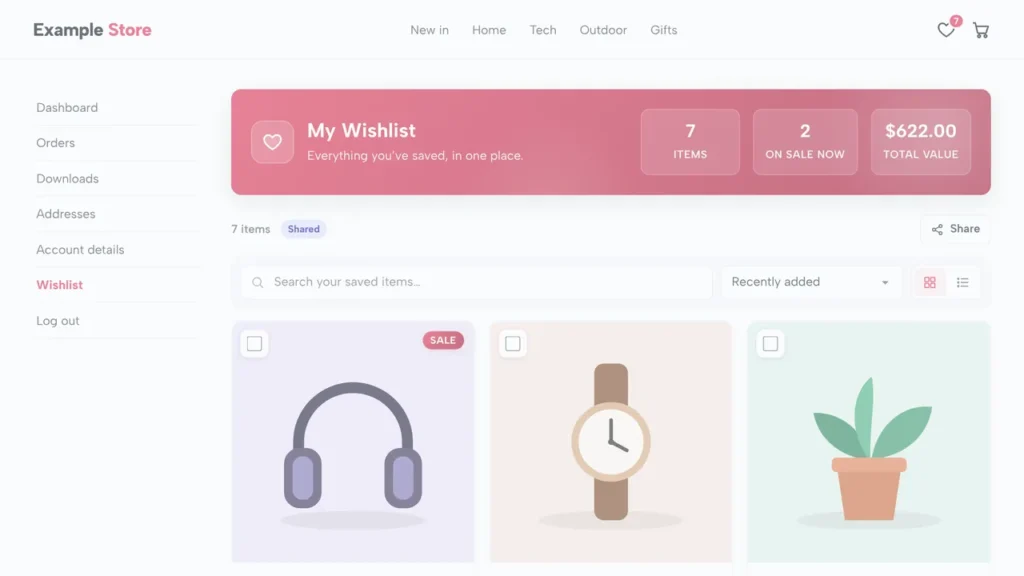
A wishlist lets a shopper save a product without buying it yet. They click a heart on the product, and the product is added to a personal list. Later they can open the list, see the current price and stock status of each item, and add items to the cart from there.
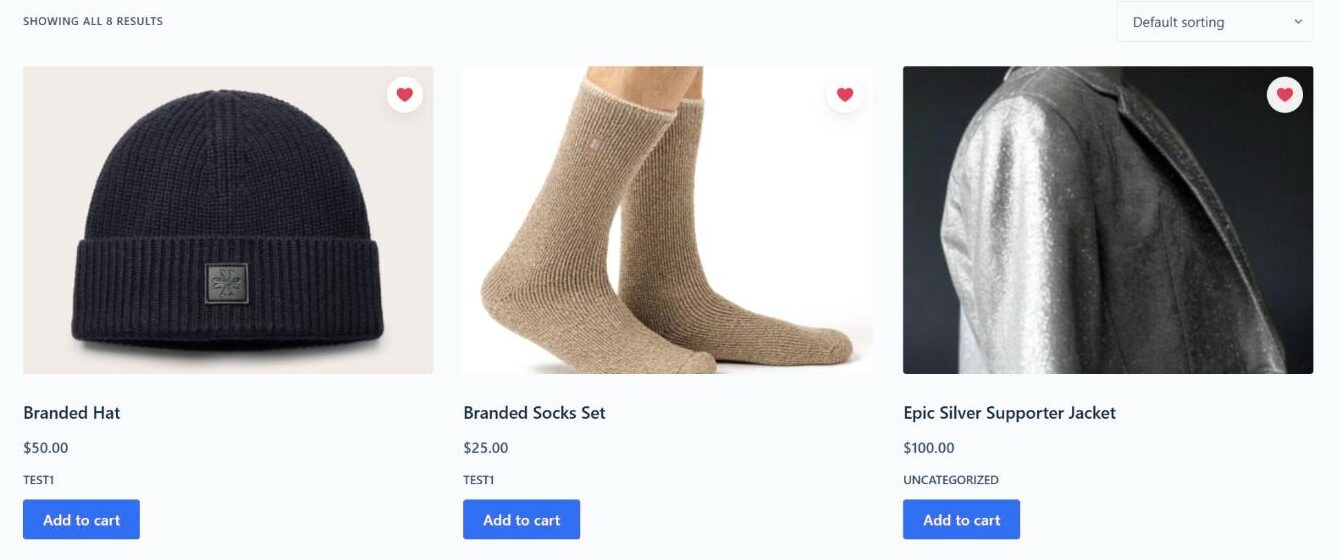
You get something from it as the store owner too. The wishlist dashboard in your admin shows how many items shoppers have saved and which products are saved most often, which helps when you plan stock or pick products for a sale.
What you need before you start
- A WordPress site with WooCommerce active, and an administrator login.
- WordPress 6.5 or later, PHP 7.2 or later and WooCommerce 6.0 or later.
- Any WooCommerce theme. Classic themes and block themes both work, and block themes have one extra step for the header link (step 7).
How to add a wishlist to WooCommerce
Step 1: Install Simple Wishlists
Get the plugin from the Simple Wishlists page. The PRO version has a 7-day free trial and includes every free feature used in this guide.
In your WordPress admin, open Plugins, add a new plugin and upload the ZIP file. Then click Activate. WooCommerce has to be active first, because Simple Wishlists lists it as a required plugin. After activation, a Wishlists menu appears in the admin.
Step 2: Run the setup wizard
The setup wizard opens the next time you load an admin page. It asks a few questions and saves each answer as you go:
- Wishlist page: create a new page for the wishlist (recommended) or choose a page you already have.
- Button: the position and style of the button, with a preview.
- Guests & sharing: whether shoppers need to log in to save, and whether they can share their lists.
- Counter: a wishlist link with a count in one of your menus, or a floating heart in the corner of the screen.
- Look: your main and accent colours and the button shape.
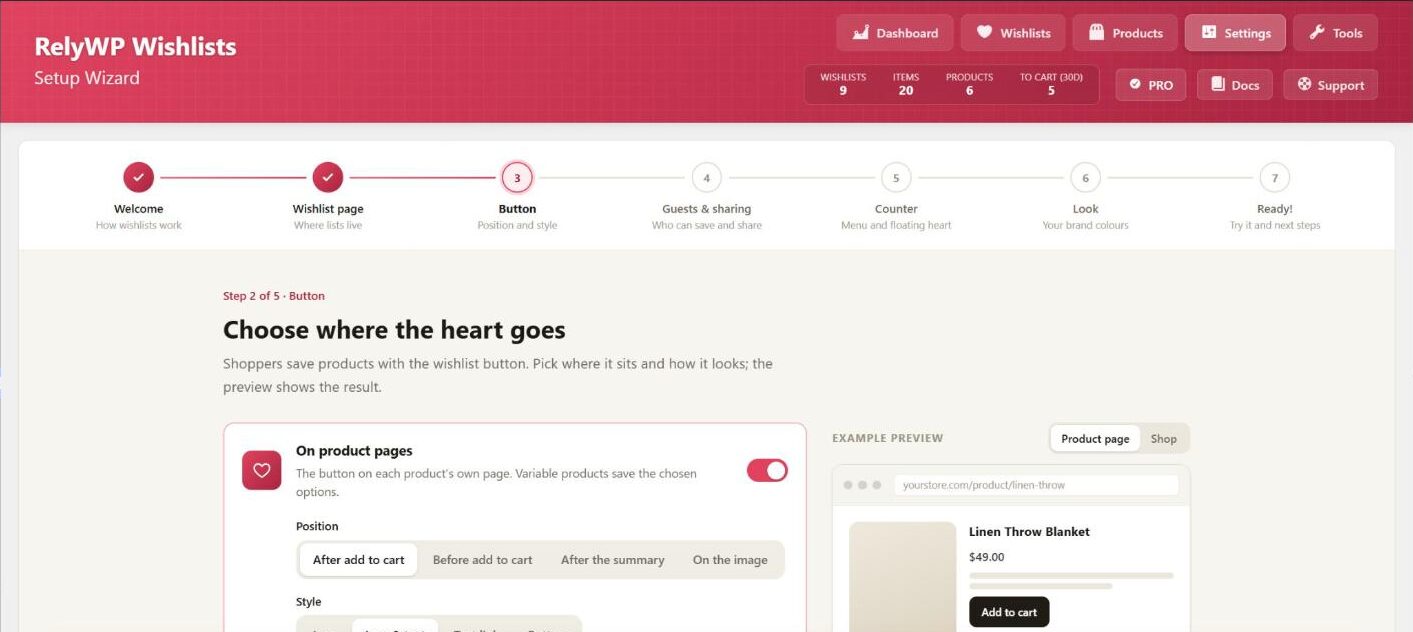
Every step has a default, so you can click Continue on anything you are unsure about and change it later. If you activated several plugins at once, the wizard does not open by itself. Open it with the “Setup wizard” link at the top of Wishlists › Settings.
When the wizard finishes you already have a working wishlist. Steps 3 to 7 go through the same settings in more detail, so you know what each one does.
Step 3: Choose where the wishlist button shows
Go to Wishlists › Settings › Button. Product pages and shop pages have separate settings.
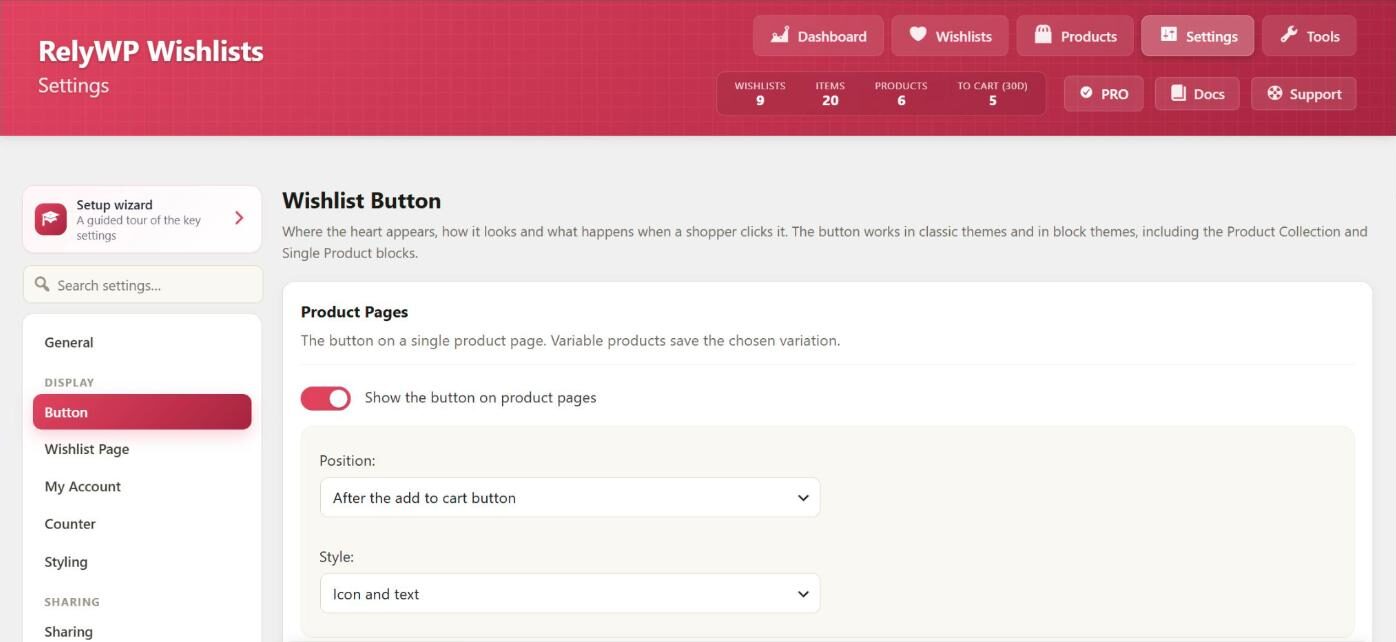
On product pages, the button shows after the add to cart button by default, with an icon and the text “Add to wishlist”. You can move it before the add to cart button, after the product summary or over the product image. To place it yourself, choose Nowhere (I will place it with a shortcode or block) and add the [swlp_button] shortcode or the Wishlist Button block where you want it.
On shop and category pages, turn on Show the button on product cards. The default is a heart over the product image. This setting also covers search results and product blocks such as Product Collection.
Two more settings on this tab are useful to check:
- Icon: a heart, a star or a bookmark.
- After saving: by default the shopper sees a small notification with a link to the wishlist. You can send them to the wishlist page instead, or only fill in the icon.
Step 4: Check the wishlist page and the My Account tab
If you let the wizard create the wishlist page, it is already set under Wishlists › Settings › General. To use your own page, add the [swlp_wishlist] shortcode or the Wishlist block to it and select the page in the Wishlist page setting. Guests need this page, because they have no account area.
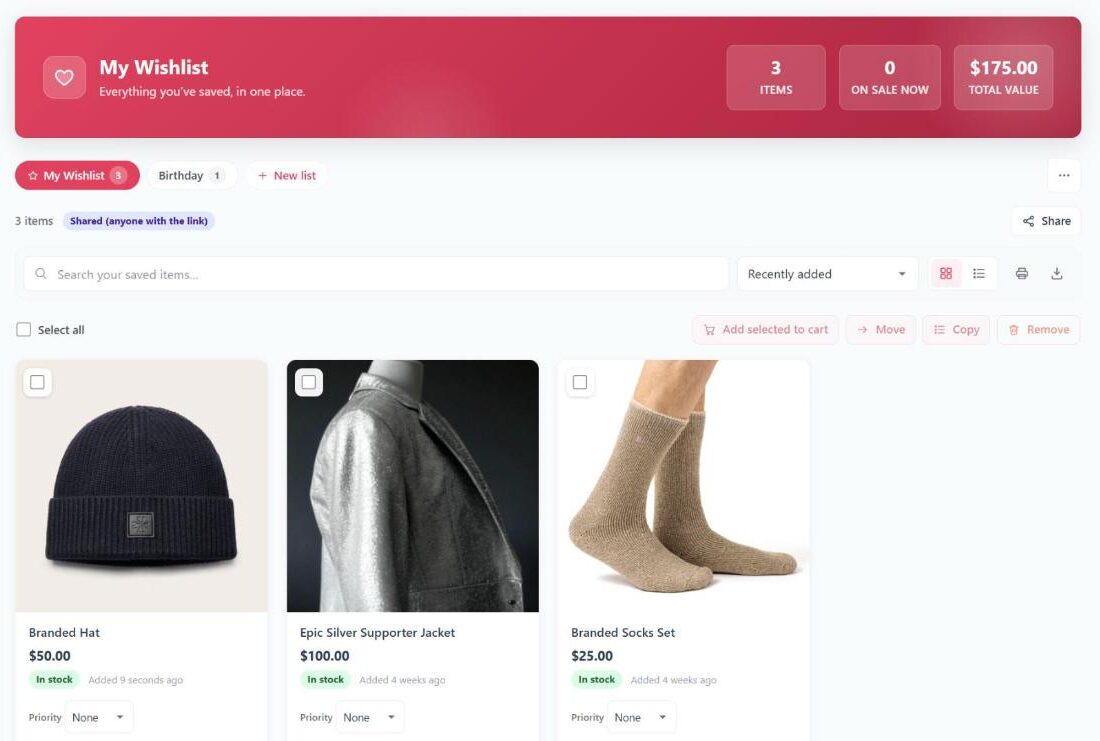
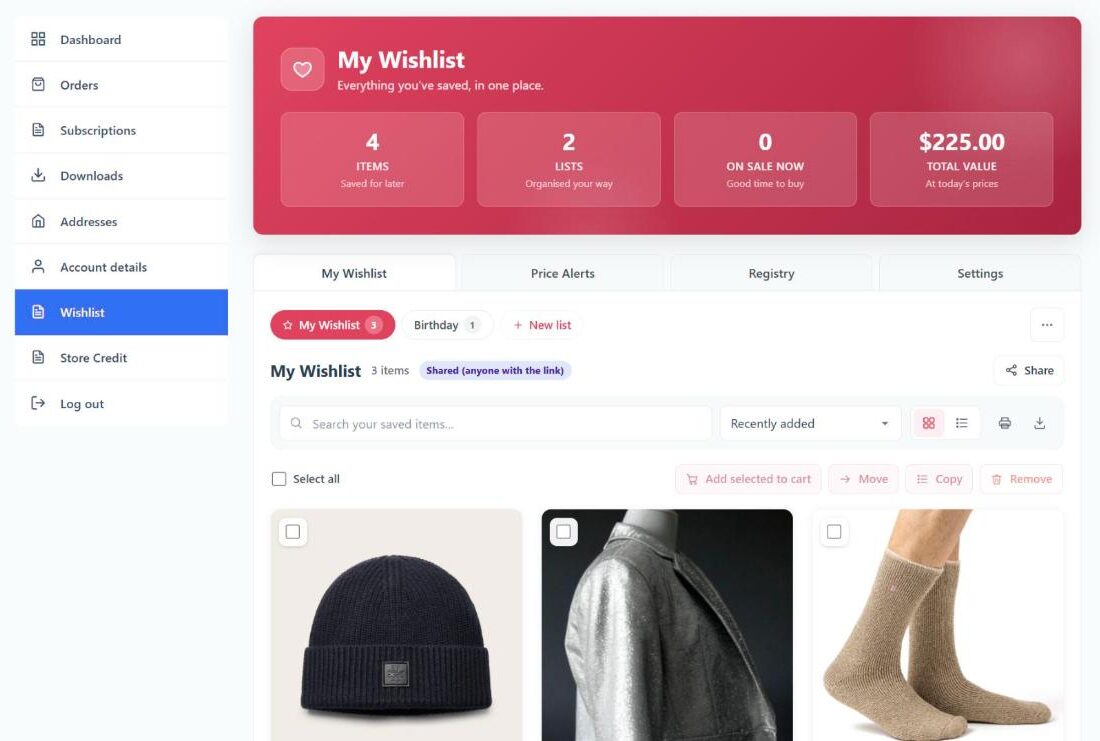
The layout settings are on the Wishlist Page tab. The list shows as a grid by default, with 24 items per page, and shoppers can switch to a table. Each item can show its stock status, the date it was added and the price change since it was saved. The “Add all to cart” and “Add selected to cart” buttons are on by default.
Logged-in customers also get a Wishlist tab in My Account, placed before Log out. It is on by default, and you can rename it or change its URL under Wishlists › Settings › My Account. If the tab shows a “page not found” error after you change the URL, go to Settings › Permalinks and click Save Changes once.
Step 5: Decide whether guests can save products
The two settings for this are in the “Who Can Save Items” section of Wishlists › Settings › General.
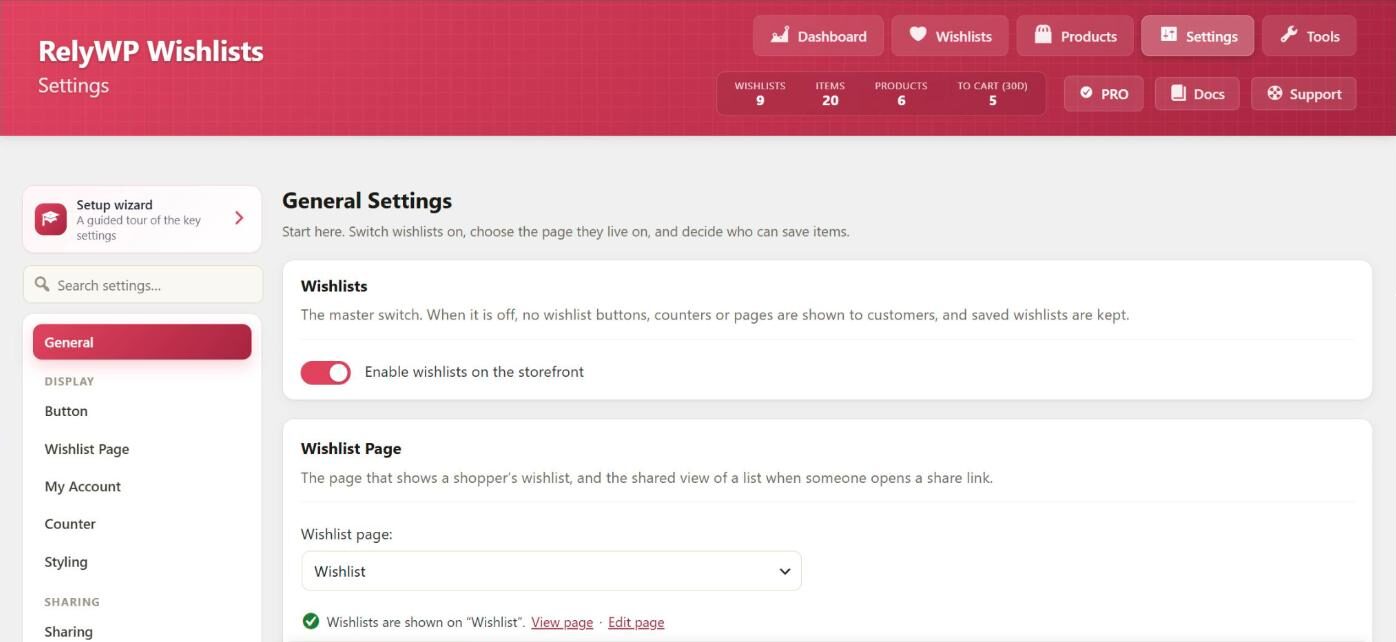
Let guests (logged-out shoppers) keep a wishlist is on by default. A guest’s list is tied to a cookie in their browser, so it stays on that browser and that device. If they open your store on another device, the list there starts empty. A guest list with no activity is deleted after 30 days, and you can change that number in Delete inactive guest wishlists after.
When a guest logs in or registers, the items they saved move into their account’s wishlist. Products that are already on the account’s list are not added twice.
Require customers to log in before they can save items is off by default. If you turn it on, a logged-out shopper who clicks the heart is sent to My Account to log in, and the product is saved after they do. Turning it on also turns guest wishlists off. For most stores we suggest leaving guests allowed, because a login step adds work before a shopper can save a product. Requiring login makes sense if your store already needs an account to buy, such as a wholesale or members store.
Step 6: Let shoppers share their wishlist
Sharing is on by default, and its settings are under Wishlists › Settings › Sharing. Each list has its own share link. New lists start as Private, so nobody else can open a list until its owner clicks Share and changes it to one of the other two levels:
- Shared (anyone with the link): people with the link can view the list. Search engines never index it.
- Public: anyone can view the list. Search engines can only index it if you turn on Let search engines index public lists.
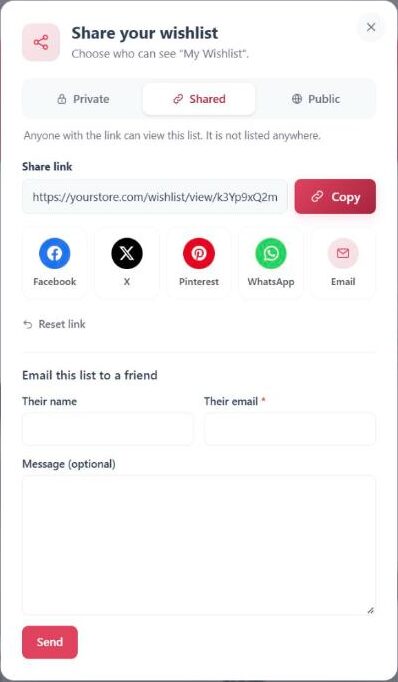
The owner can copy the link or post it with the share buttons for Facebook, X, Pinterest, WhatsApp and email. You can switch each button on or off. The form for emailing the list to a friend, shown at the bottom of this screenshot, is a PRO feature.
Someone who opens a shared link sees a read-only copy of the list. They can add single items or the whole list to their own cart.
Step 7: Add a wishlist link to your header
Shoppers need a way to get back to their list. Go to Wishlists › Settings › Counter. How you add the link depends on your theme:
- Classic themes: choose a menu location in Add the counter to:. A heart with the number of saved items is added to the end of that menu.
- Block themes: the menu location list is empty, because block themes have no classic menu locations. Open Appearance › Editor and add the Wishlist Counter block to your header.
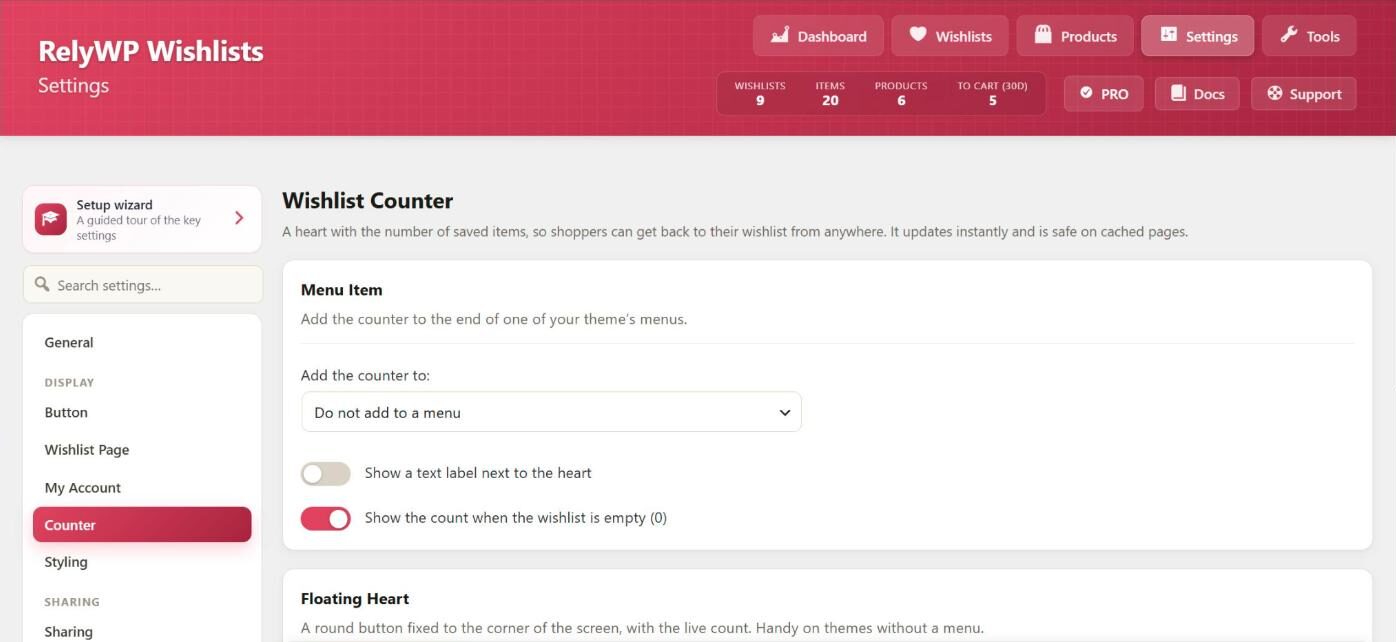
You can also turn on Show the floating heart, which fixes a round button with the count to the bottom corner of every page. It suits mobile layouts and themes without a menu. By default it stays hidden until the shopper has saved something.
Step 8: Test the wishlist as a shopper
Open your store in a private browser window, so you are logged out, and go through it the way a shopper would:
- Click the heart on a product in the shop, then on a product page.
- Check that the count in your header goes up.
- Open the wishlist page and add an item to the cart from it.
- Log in as a test customer and check that the saved items are now on that account’s list.
If you sell variable products, test one of those as well. On the product page, the button saves the variation the shopper has selected, such as “Blue, Large”. A heart on a shop page has no options to select, so it saves the parent product. When a shopper adds that item to the cart from the wishlist, they are sent to the product page to choose the options first.
If the button does not appear, the button troubleshooting guide lists the settings and theme issues to check.
Price drop alerts and other PRO features
The steps above give you a complete wishlist. The PRO version adds ways to bring shoppers back to the items they saved. You do not need any of them to run a wishlist.
The main one is alert emails, under Wishlists › Settings › Price & Stock Alerts. A customer can get an email when a saved item drops in price, goes on sale or comes back in stock. By default a price has to drop by at least 5% to trigger an alert, and each customer gets at most one alert email every 24 hours, with all the changes in that time combined into it. Alerts are for logged-in customers only, so guests do not get them.
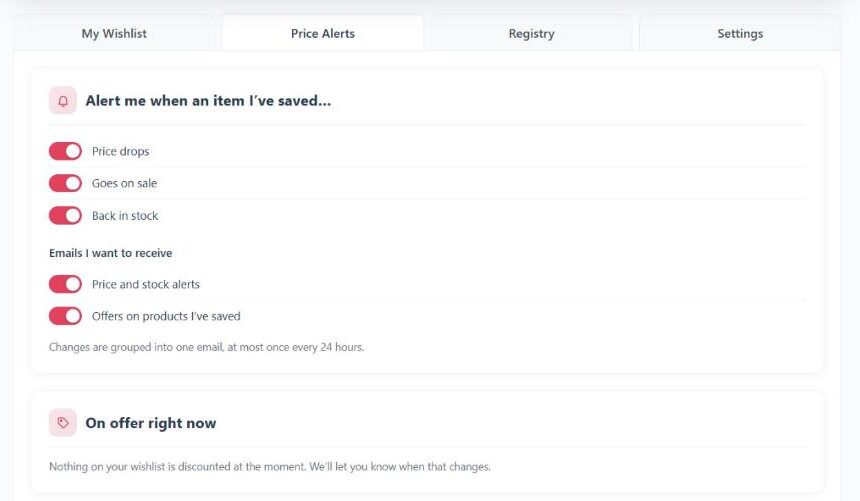
PRO also includes:
- Multiple wishlists per customer, with notes and a priority on each item.
- Reminder emails about saved items.
- Gift registries for events such as weddings.
- A “Save for later” option in the cart.
PRO costs $9.99 a month, $79.99 a year or $299.99 once for one site, with a 7-day trial and a 14-day refund period. The free and PRO comparison has the full split.
Moving from another wishlist plugin
If your store already has a wishlist plugin, your customers’ lists can come with you. Simple Wishlists imports from YITH WooCommerce Wishlist, TI WooCommerce Wishlist, WPC Smart Wishlist and the WooCommerce Wishlists extension. The tool is under Wishlists › Tools, in the “Import from another wishlist plugin” card.
The old plugin does not need to be active, and its data is not changed. Running the import twice is safe, because lists that were already imported are skipped. There is one limit: guest wishlists are not imported, because they cannot be matched to a customer account. The import guide lists what is copied from each plugin.
Other ways to add a wishlist to WooCommerce
Simple Wishlists is new. Version 1.0.0 came out on 17 November 2026, so it has no public reviews yet. If you want a plugin with a long history and many reviews, these are the established options. Figures were checked on 19 November 2026.
- YITH WooCommerce Wishlist: free on WordPress.org, with 400,000+ active installations and a rating of 3.9 out of 5 from 263 reviews. It needs WordPress 6.9 and PHP 8.0. Multiple wishlists per customer are in the premium version.
- TI WooCommerce Wishlist: free on WordPress.org, with 100,000+ active installations and 4.7 out of 5 from 504 reviews. Multiple wishlists and wishlist privacy settings are in the premium version.
- Wishlists for WooCommerce: a paid extension sold on WooCommerce.com for $89 a year, developed by Element Stark. It supports guest wishlists and has no free version listed. It is rated 3.5 out of 5 from 8 reviews.
- A theme with a wishlist included: some WooCommerce themes come with their own wishlist. That saves you a plugin, but the wishlist then depends on the theme. If you change theme later, check whether your customers’ saved lists will still be there.
FAQ
Does WooCommerce have a built-in wishlist?
No. WooCommerce has no wishlist feature of its own. You add one with a wishlist plugin or with a theme that includes a wishlist.
Can shoppers use a wishlist without an account?
Yes, with Simple Wishlists guests can save products by default. The list is kept in the browser they used, for 30 days after their last activity unless you change that setting. You can also require a login before anyone can save.
What happens to a guest’s wishlist when they log in?
The items move to the wishlist on their account, and the guest list is removed. Products that were already on the account’s list are not duplicated.
Does the wishlist work with block themes and product blocks?
Yes. The heart appears in product blocks such as Product Collection and on single product templates without extra setup. The one manual step is the header link: add the Wishlist Counter block to your header in the site editor.
Can I use a wishlist with page caching?
Yes. The counter’s HTML is the same for every visitor, so the page can be cached. The count is loaded with a small request after the page loads, and only for shoppers who have saved something. The page caching guide has more detail.
Can I see which products are saved the most?
Yes. The wishlist dashboard in your admin shows store totals and recent activity, and there is a report of your most wishlisted products.
Summary
To add a wishlist to WooCommerce, install a wishlist plugin, run its setup, and then check four things: the button position, the wishlist page, the guest setting and the link in your header. Finish with a test in a private browser window. If you want to see everything Simple Wishlists can do, the launch post goes through each feature, and the documentation covers every setting.

Grow your WooCommerce store
Our plugins are trusted on 248,000+ WordPress sites.
7-day free trial on any pluginBF2026 30% off your first payment

Turn coupon codes and referral links into an affiliate program.

Reward customers with points they can spend on future orders.
Also: Store Credit · Wishlists · Customer Reports
Comments