





Set up the Wishlist tab in My Account
Simple WishlistsUpdated
The plugin adds a Wishlist tab to the WooCommerce My Account menu, just before Log out. Logged-in customers see their lists there with a header, stat cards and a settings tab. Configure it under Wishlists › Settings › My Account.
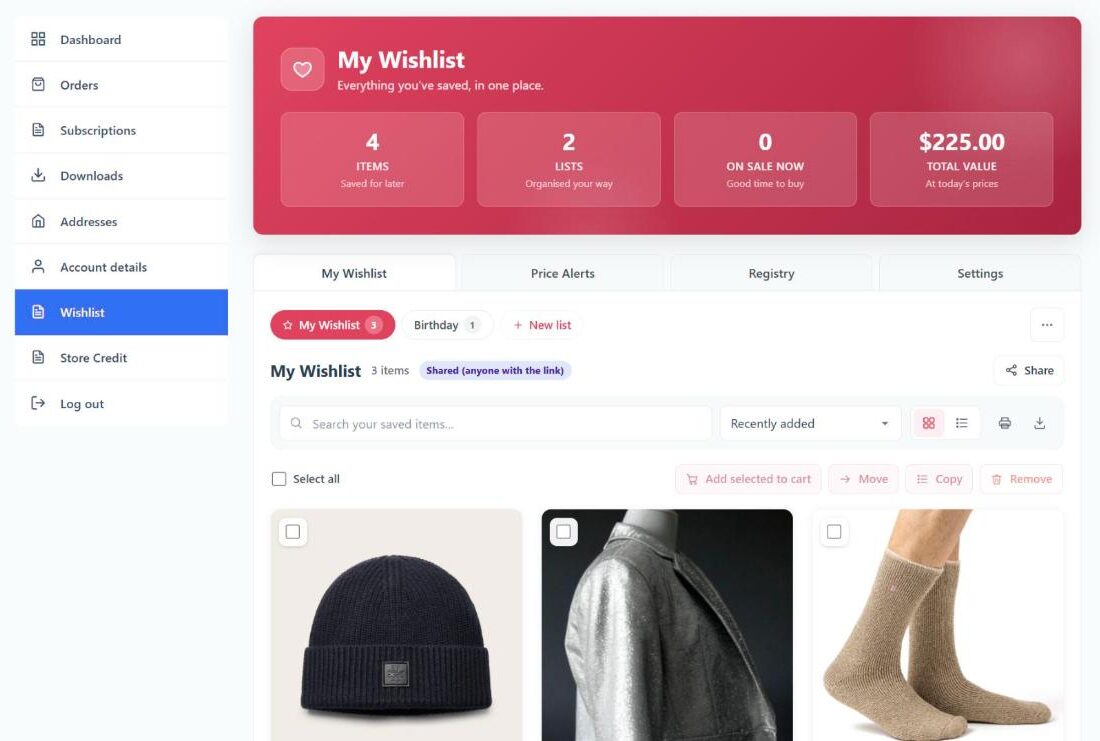
Turn the tab on and rename it
- Add a Wishlist tab to My Account: on by default.
- Menu label: the text in the My Account menu. Default: “Wishlist”.
- URL slug: the last part of the address, for example
/my-account/wishlist/. Use lowercase letters, numbers and hyphens only.
If the tab shows a “page not found” error after you change the slug, go to Settings › Permalinks and click Save Changes once.
Customise the dashboard header
- Show the header with the title and stats: shows a coloured header above the customer’s lists.
- Title: leave empty for “My Wishlist”.
- Subtitle: leave empty for “Everything you’ve saved, in one place.”
- Show stat cards in the header: then choose which cards to show: Items saved, Number of lists, Items on sale now and Total value of the wishlist.
The header colours and style come from the Styling tab.
The customer Settings tab
With Show a Settings tab to customers turned on, the dashboard has a Settings tab where customers can:
- Choose the privacy of new lists (Private, Shared or Public).
- Delete all of their wishlist data with Delete all my wishlist data. This removes every list and saved item from their account and cannot be undone.
In PRO, the dashboard can also show an Alerts tab for price and stock alert preferences, and a Registry tab for gift registries.