






If you’re looking to add an extra layer of security to your WordPress site, Cloudflare’s brand-new “Turnstile” service is an impressive user-friendly, privacy-preserving alternative to Google reCAPTCHA.
In this article, we’ll show you how to add Cloudflare Turnstile to all your WordPress website forms!
Get Your Cloudflare Keys
First, create a Cloudflare account at: https://dash.cloudflare.com/sign-up
Once your account is created, visit the Cloudflare Dashboard, select “Turnstile” in the menu sidebar, and click “Add site”.
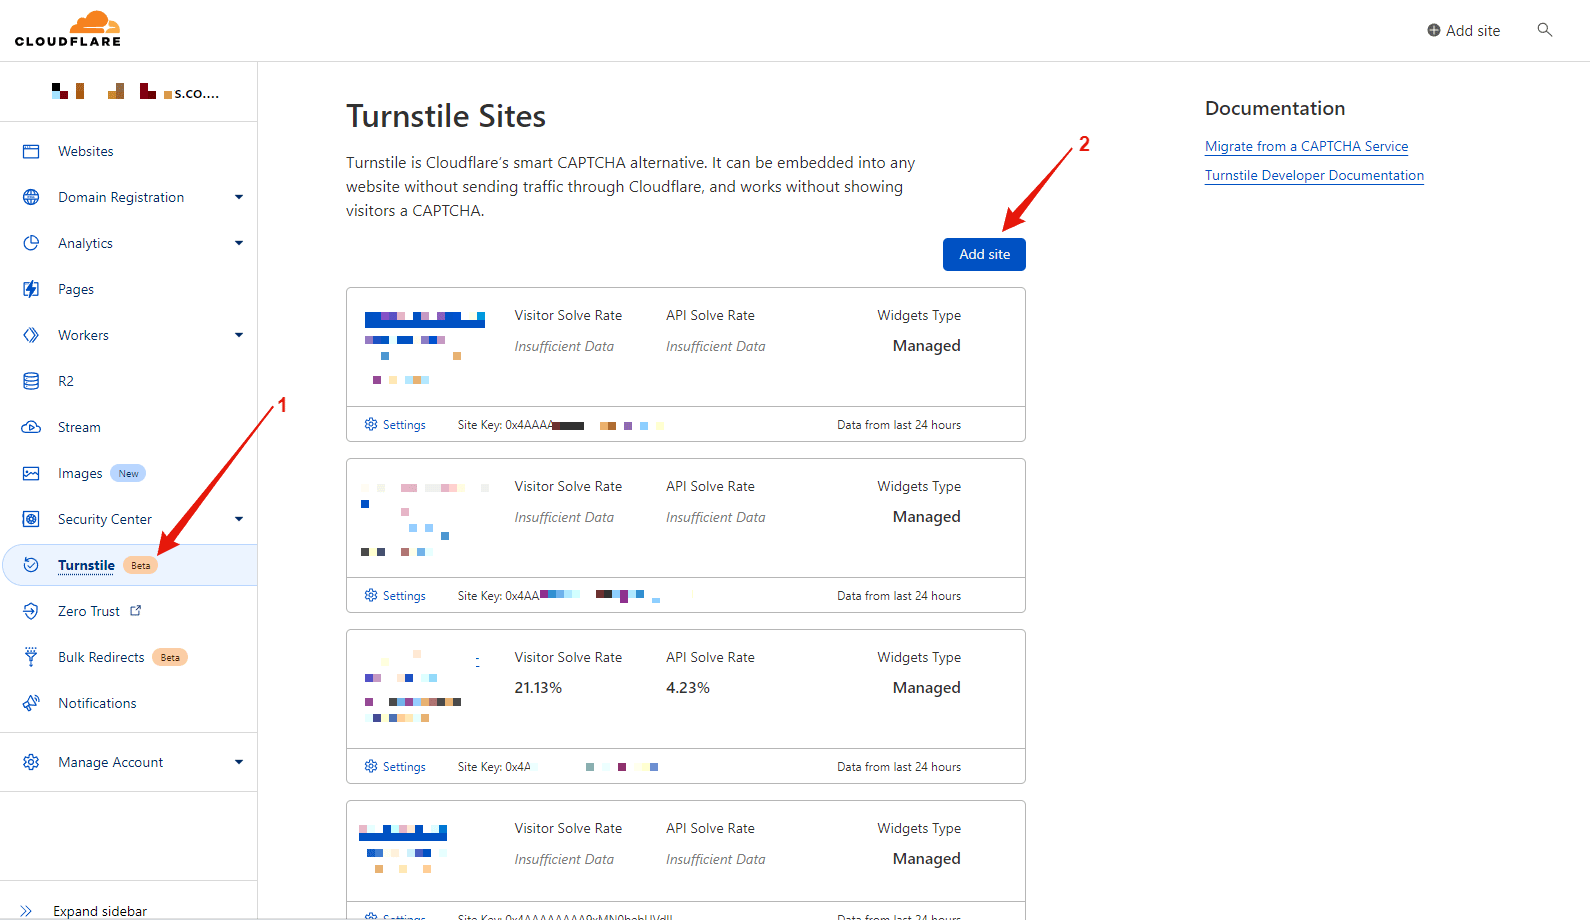
Next, you’ll be required to enter a site name, domain, and select the widget type.
- Managed (Recommended): Cloudflare will use information from the visitor to decide if an interactive challenge should be used. If it does show an interaction, the user will be prompted to check a box (no images or text to decipher).
- Non-interactive: A purely non-interactive challenge. Users will see a widget with a loading bar while the browser challenge is run.
- Invisible: Challenge that does not require interaction.
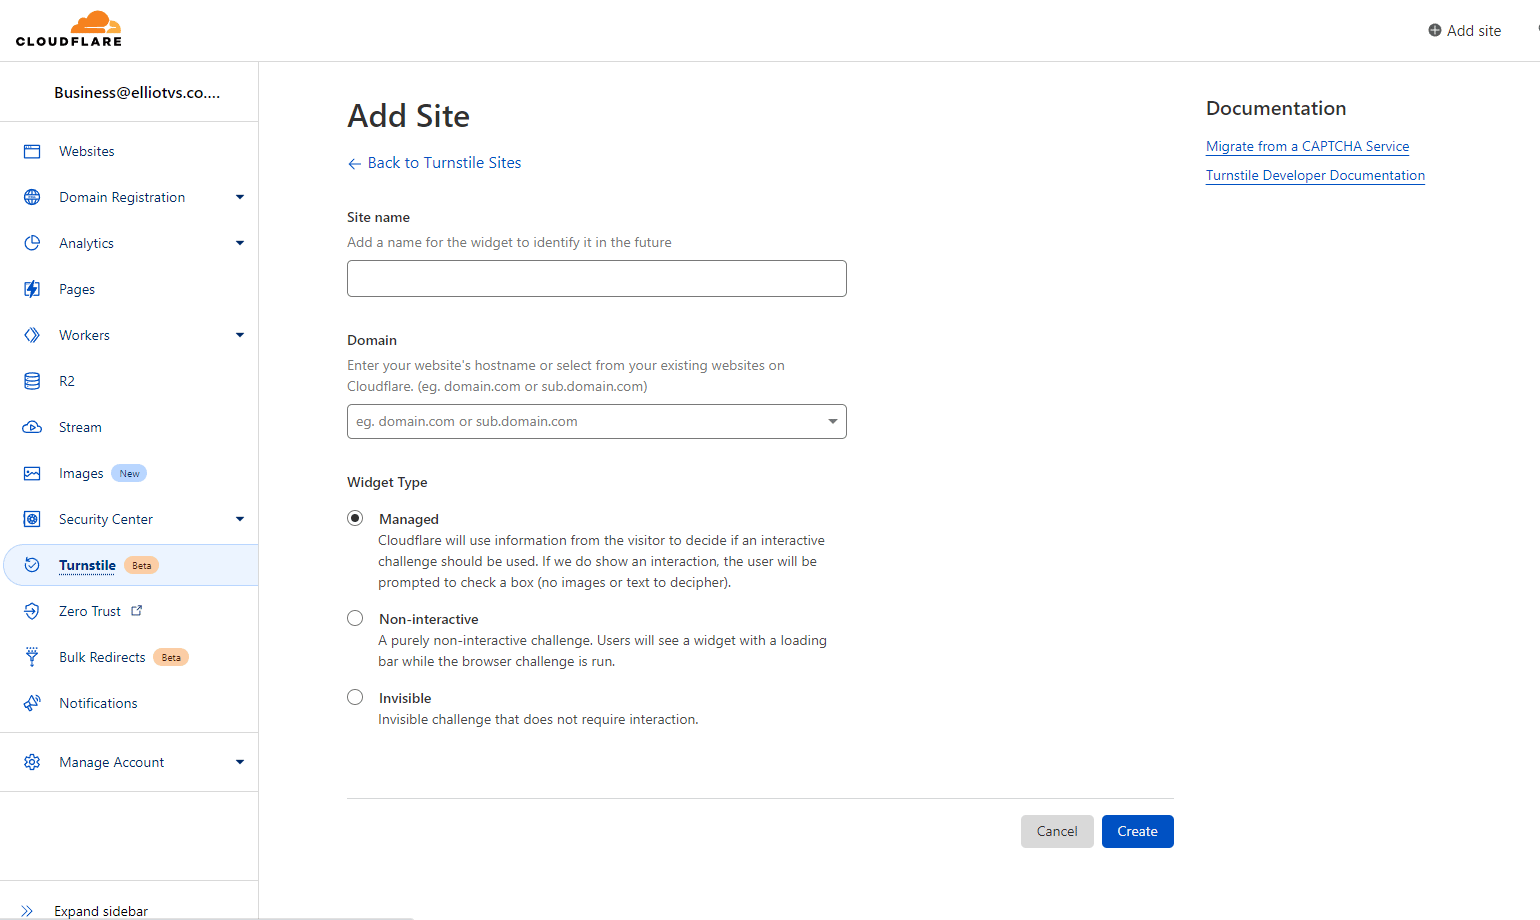
Click the “Create” button, and you will be given a “Site Key”, and “Secret Key”. Keep this page open, as you will need to copy them later.
Install The WordPress Plugin
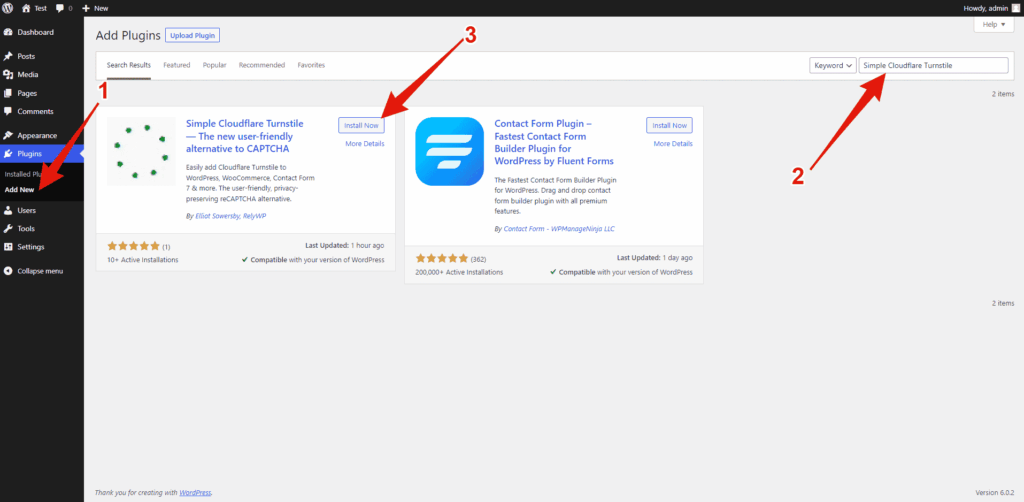
Now you will want to go ahead and install the “Simple Cloudflare Turnstile” plugin on your website.
To do this, go to “Plugins > Add New” in your WordPress admin area, then search for “Simple Cloudflare Turnstile”, click “Install”, and finally click the “Activate” button that shows once it’s installed.
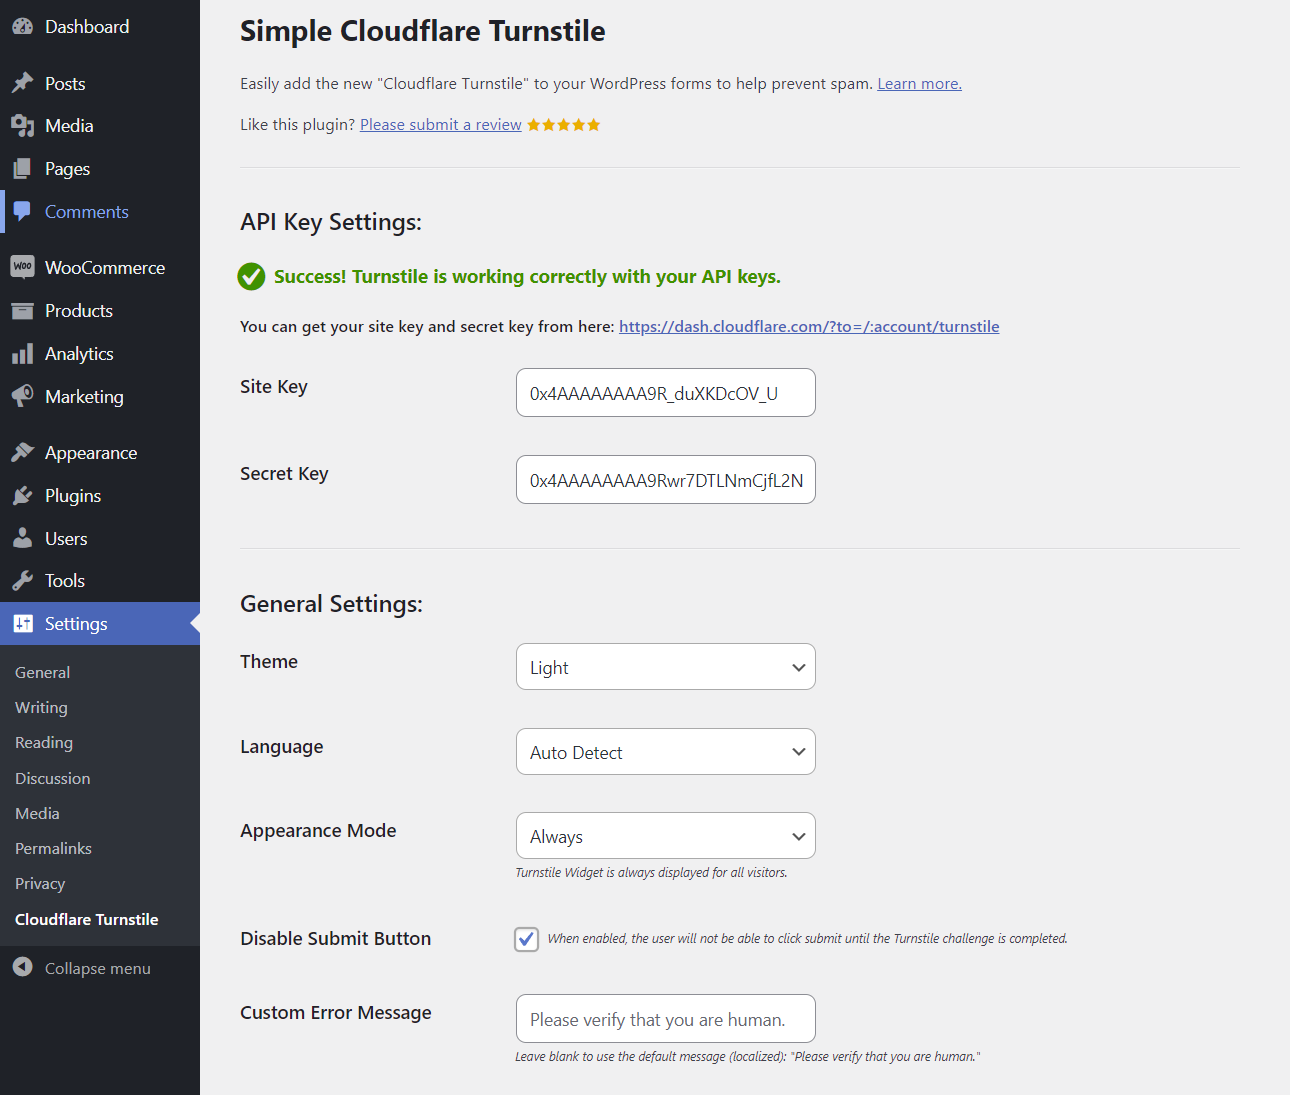
You will then be taken to the settings page for Simple Cloudflare Turnstile.
Here you will be able to customise several options:
- Site Key and Secret Key.
- Widget Theme (light or dark).
- Widget Language.
- Appearance Mode – when set to Turnstile Widget is only displayed in cases where an interaction is required. This essentially makes it “invisible” for most valid users.
- Disable Submit Button until challenge is complete.
- Custom Error Message
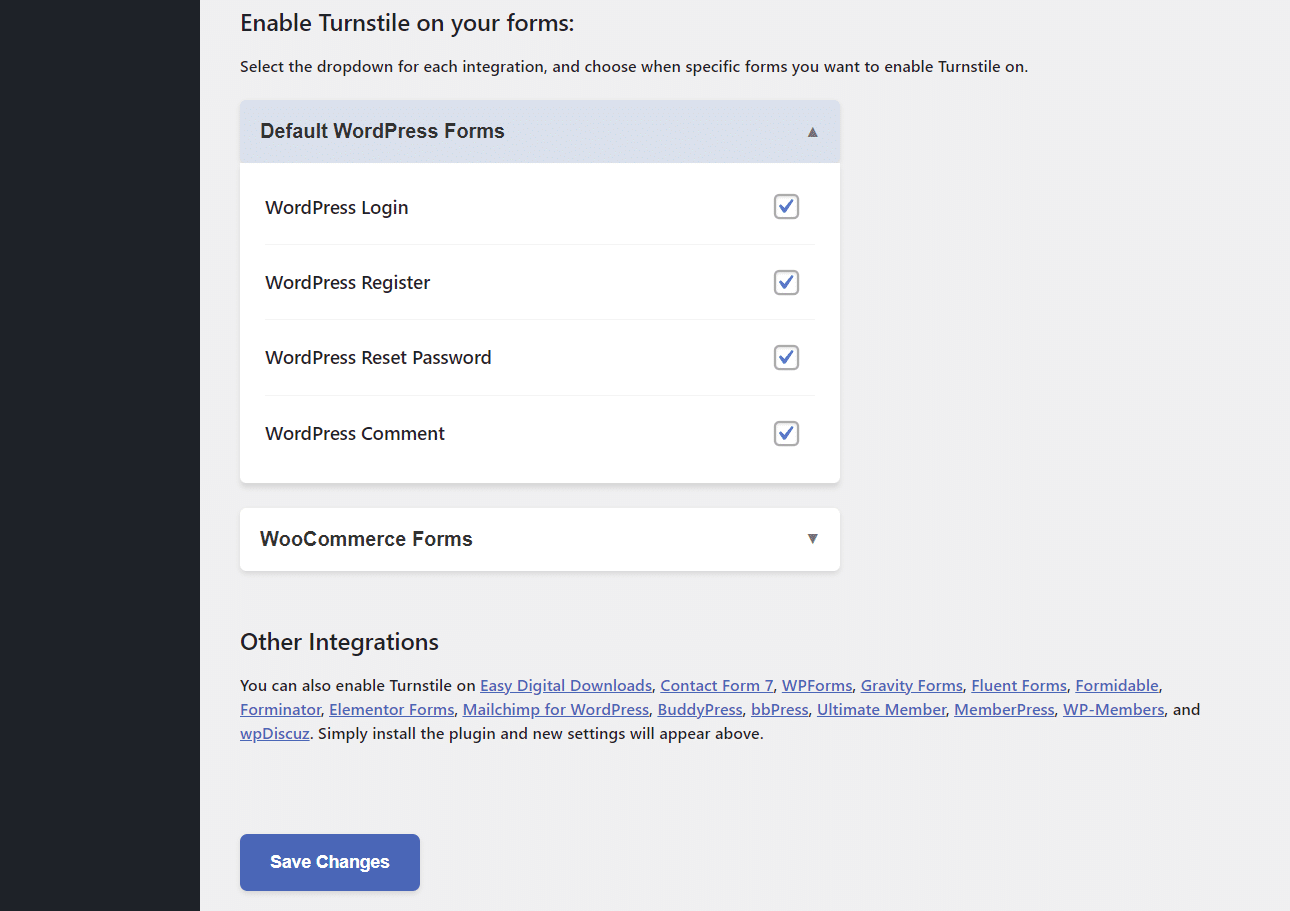
Further down the settings page, you will see several different tabs based on what plugins your site has installed. Here you can enable Turnstile on your websites forms.
Simply toggle the tabs, and select the checkbox for each form you want to enable Turnstile on. There may also be some other settings available for certain integrations.
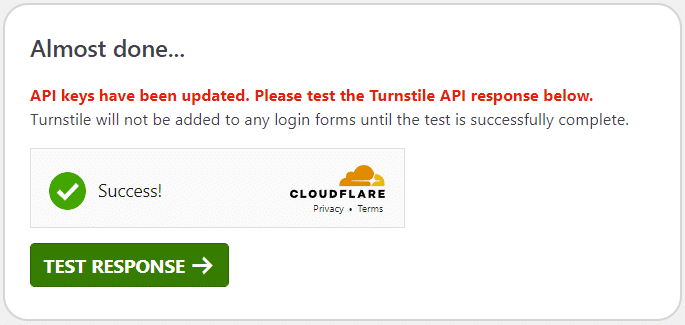
Finally, when you first start your “Site Key” or “Secret Key”, or update it, you will be required to test the API response, to make sure everything is working OK. Simply complete the Turnstile challenge, and click “TEST RESPONSE”.
Supported Integrations
You can currently enable Turnstile on the following forms:
WordPress
- Login Form
- Registration Form
- Password Reset Form
- Comments Form
WooCommerce
- Checkout
- Pay For Order
- Login Form
- Registration Form
- Password Reset Form
Form Plugins
- WPForms
- Fluent Forms
- Contact Form 7
- Gravity Forms
- Formidable Forms
- Forminator Forms
Other Integrations
- Elementor Pro Forms
- Easy Digital Downloads Forms
- Mailchimp for WordPress Forms
- BuddyPress Registration Form
- bbPress Create Topic & Reply Forms
- MemberPress Forms
- Ultimate Member Forms
- WP-Members Forms
- wpDiscuz Comments Form
- WordPress Multisite
Example Screenshot
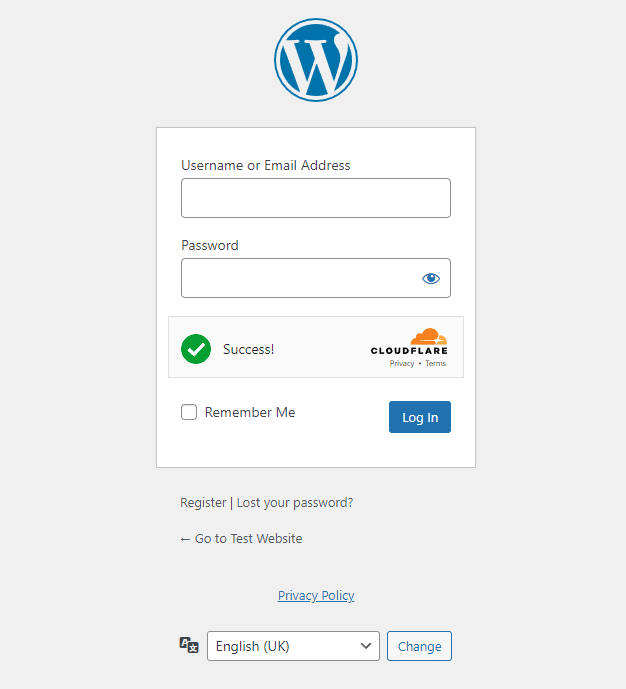
Here’s an example of what the Turnstile challenge will look like when enabled on your WordPress Login Form:
Why is Turnstile better than reCAPTCHA?
There are two main ways in which Turnstile is better than reCAPTCHA. Firstly, it doesn’t require user interaction, meaning that users don’t have to solve a puzzle or click images, making the process much easier and user-friendly.
Secondly, it’s a big improvement in terms of privacy, since the data sent by reCAPTCHA to Google is used for ad targeting, while Cloudflare Turnstile claims they will “never harvest data for ad retargeting”.
To learn more about Cloudflare Turnstile, click here.

Our plugins
Grow your WooCommerce store
Affiliates, loyalty points, store credit, tax exemption and more – trusted on 246,000+ sites.


Comments